PAINT GUIDE for FISHING BOATS
Easy to follow instructions for DIY

PAINT GUIDE for FISHING BOATS
Easy to follow instructions for DIY
OVERVIEW
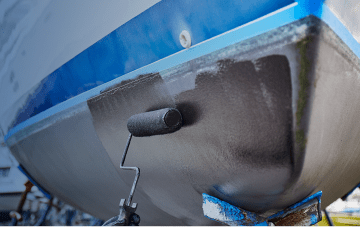
I will explain what kind of preparation and work is required to actually apply the bottom paint.
| Preparation | Preparation of tools and calculation of required amount of paint |
| Removal | 1. Removal 2. Rinsing 3. Sanding 4. Tape |
| Painting | 5. Primer coating (new boat only) 6. 1st AF painting 7. Sanding (Waiting for drying & 2nd coat) 8. Additional Coating |
| Finish | 9. Finishing |

PREPARATION
Before you start…
- Before using a new brush, squeeze it well to remove any loose hair.
- Avoid painting in case of rain or high humidity.
Important Equipments
What to prepare
Paint | Roller Brush | Tray | Scraper |
Tape | Work gloves | Paint brush | Waterproof paper |
Additional Equipments
Optional equipments to prepare
Cap | Appropriate thinner | Container for small portion | Mixer |
Goggles | Dust mask |
|
Important Equipments
What to prepare
Paint | Roller Brush |
Tray | Scraper |
Tape | Work gloves |
Paint brush | Waterproof paper (#150-#200) |
Additional Equipments
Optional equipments to prepare
Cap | Appropriate thinner |
Container for small portion | Mixer |
Goggles | Dust mask |
Amount of Paint to Prepare
Calcutale the amount of paint you need
| Ship bottom area = | waterline length X ( maximum width + draft ) |
| Outboard area = | (full length + maximum width) X Dryboard depth X2 |
| Dock area = | Overall length X maximum width X 0.75 |
Approximate amount of antifouling paint
| Fishing Boat Size | Paint Amount |
| 17 feet | 4.0kg |
| 21 feet | 6.0kg |
| 23 feet | 8.0kg |
| 25 feet | 9.0kg |
| 30 feet | 12.0kg |
| 33 feet | 14.0kg |
REMOVAL
| 1 | Removal Wipe off the release agent and oil adhering to the new boat with a cleaner. Removes adhered organisms and floating paint with a scaler. |
| 2 | Rinsing Rinse off the salt with fresh water. |
| 3 | Sanding Sandpaper is hung on the entire bottom of the ship. |
Note After hanging the paper, wash it with clean water or blow it with air to remove dust from the surface. |

| 4 | Tape Apply masking tape along the draft line. |
PAINTING
| 5 | Primer coating (new boat only) Apply primer ( Mariart P100) for new boat. |

| 6 | 1st AF painting Mix the paint well and apply the first painting. * If the paint viscosity is high and it is difficult to apply, add a small amount of thinner to adjust. |

| 7 | Sanding (Waiting for drying & 2nd coat) Even if it is dry to the touch with your finger and apply the second painting if you want to make it a one-year specification. Keep the drying time and apply the second painting. |
| Estimated drying time Spring/Autumn: 8 to 10 hours Summer: 4 hours Winter: 16 hours |

| 8 | Additional Coating Make sure to paint in the areas indicated in the picture as an additional coat of paint. * Use the special paint ‘ Tommy Propeller Kit ‘ for propeller and the alloy part. |
Repainting checkpoint
|
Note
- Please use the paint after stirring it well.
- Be sure to apply the amount of ship bottom paint calculated by the formula.
- Paint a little thicker in places where water pressure is high (bow, stern, draft, etc.).
- When diluting the paint, use the appropriate thinners for each products..
FINISH
| 9 | Finishing Remove the masking tape. Do not submerge it immediately after painting, and keep the drying time. |
| Estimated drying time Spring/Autumn: 10 hours to 2.5 months Summer: 6 hours to 1 month Winter: 24 hours to 3 months |

Note
- Please observe the painting interval and the time until submersion.
- When storing the remaining paint, put a special thinner on the surface of the paint, close the lid completely, and store it in a cool and dark place.

